In part 1 of this series, we introduced you to SharePoint Syntex, Microsoft’s new service, which brings the power of automation to content processing and transforms your content into knowledge. We explained the licensing requirements for SharePoint Syntex and showed how to license and set up SharePoint Syntex in your Microsoft 365 environment.
In part two, we look at adding document understanding models into our newly created Syntex Content Center and how to add, classify, and train documents with SharePoint Syntex.
Finally, in part three, we consider creating forms processing models from SharePoint document libraries by using AI Builder, a feature of Microsoft PowerApps.
Be sure to join the upcoming TEC Talk webcast on the Five Practical Uses of SharePoint Syntex
Setting up a Document understanding model in SharePoint Syntex
With SharePoint Syntex licensed and set up in a tenant, we can explore its real value by adding a Document understanding model and then training some documents to extract the information we want.
To create a Document understanding model within SharePoint Syntex, open the Syntex Content Center created in part one and complete the following steps.
- Click on New, and select Document understanding model:
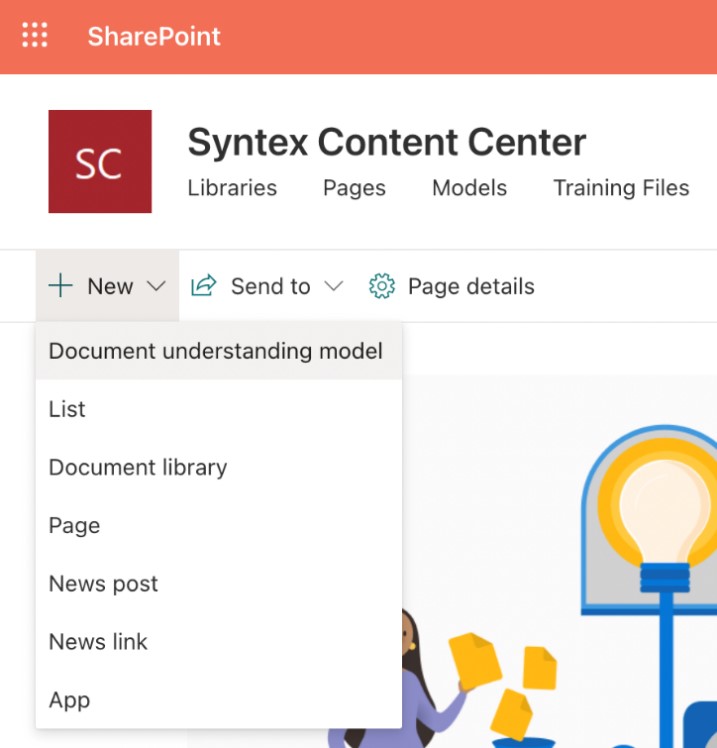
Figure 1 – Creating a Document understanding model
- For this example, I will use PDF files of my payslips. So, I will name this model Payslips. The first step is to create a new content type. A content type in SharePoint Online is a reusable collection of metadata (columns), workflow, behavior, and other settings for a category of items or documents in a SharePoint list or document library. You may also select existing content types. For more information on content types, please refer to this Microsoft article. I will also choose to apply a Retention label to any content to which this model is used. My retention label is set to trigger a compliance administrator’s Disposition review at the end of the retention period (Figure 2). Click Create when the required settings for the model are complete.

Figure 2 – Naming the document understanding model, creating a content type, and assigning a retention label
- The model creation wizard takes you to the next step, where you will see four key actions to develop your newly created model (Figure 3).
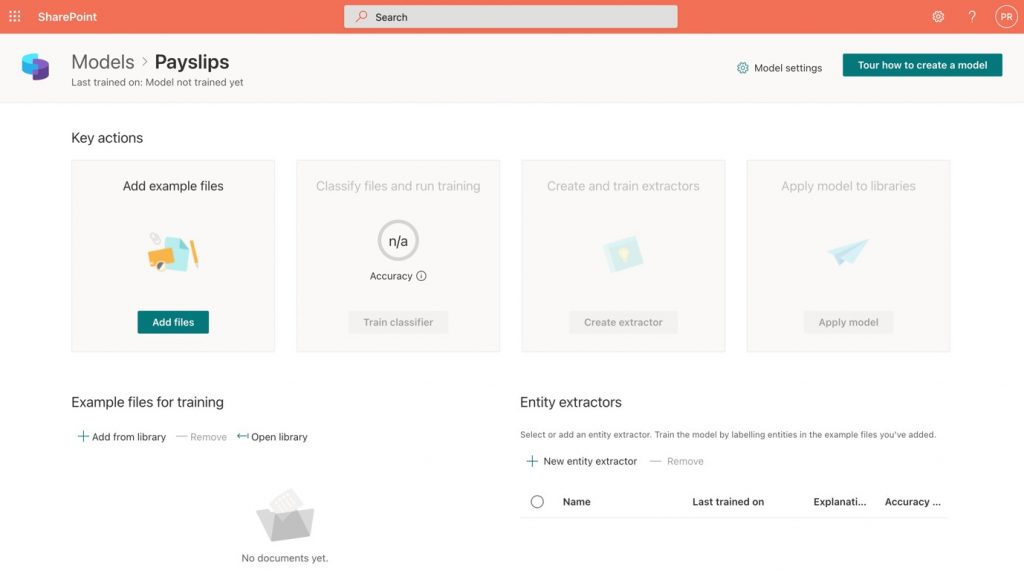
Figure 3 – Key actions are shown in the document understanding model
- Now that we have our new model, we should add some example files. To do this, click on Add files.
The example files are used to train the model. You may upload either files or folders. We must upload at least 5 files of the same (positive) type and 1 file of a different (negative) type. In this instance, I have chosen to upload 5 of my payslip PDFs as positive examples and 1 negative example, a PDF of my Microsoft certification transcript (Figure 4). Once the example files are uploaded, click Add.

Figure 4 – Adding positive and negative example files
- This takes you back to the main key actions page for your model. Next, we need to classify our files and run training. To do this, select the option to Train the classifier.
From the classifier screen, we need to select each of the documents we uploaded to our model in the left pane, then on the preview pane to the right, we choose yes or no to the question Is this file an example of Payslips? (Figure 5).
**Note that I have redacted information displayed in my preview pane in the examples that follow to protect my confidential details.
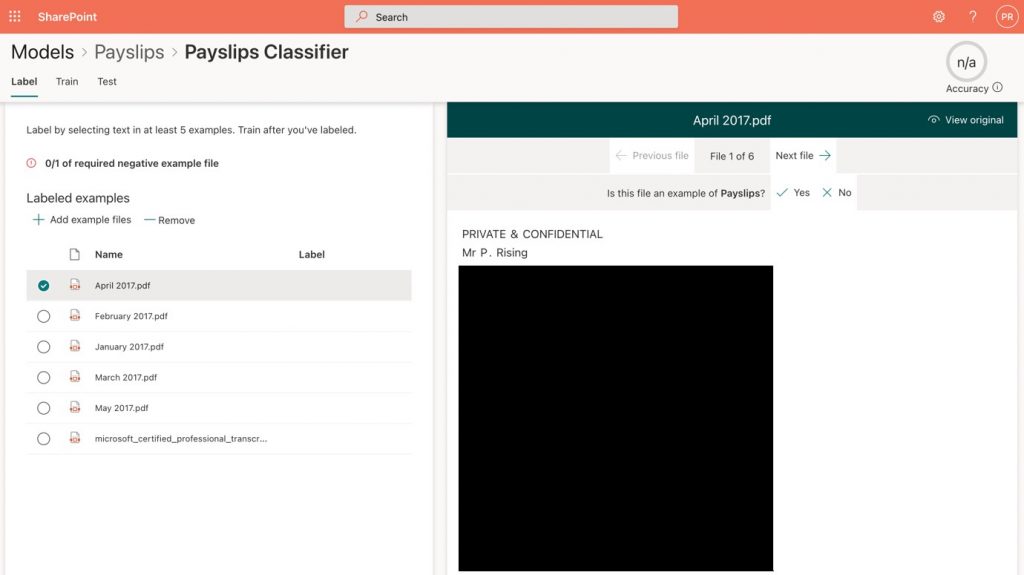
Figure 5 – Labelling files as positive or negative examples
- Make your selection against each file, and then move onto the next one by clicking on the Next file.
Figure 6 shows that I have labeled all the payslip files as positive examples and my Microsoft transcript file as the one required negative example.
An important consideration here is that ideally, a negative file should be as close an example as possible to the positive file examples. In this case, my negative example is a completely different format to that of the positive. Whilst this does work, it is not the best real-world example, but it does show you how the process works.

Figure 6 – All upload example files have been labeled
- Now we need to run the training on our files. Click on the Train tab, and you will be prompted to add an explanation that is required to help the model distinguish this type of document from others or identify the information to extract. Click on Add explanation as shown in Figure 7.
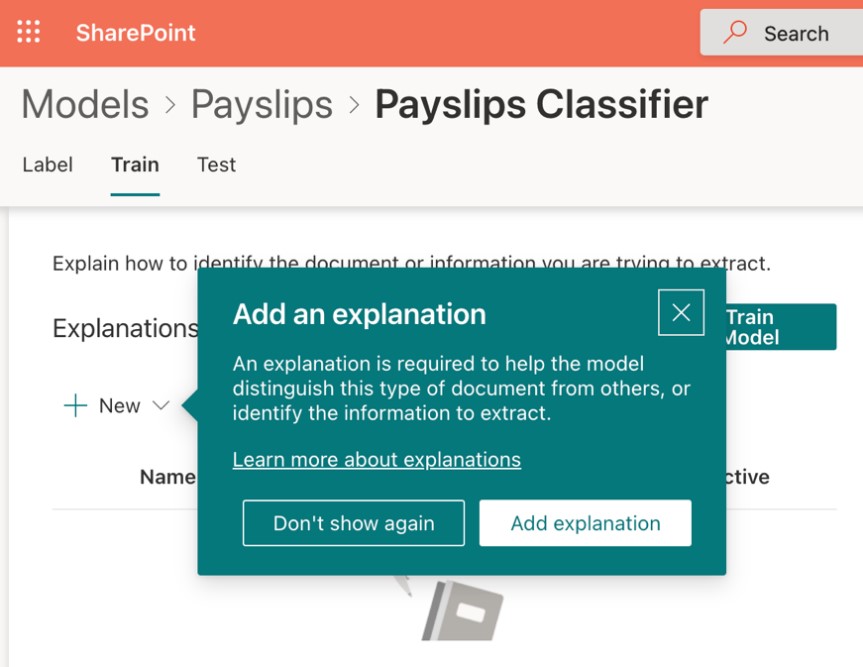
Figure 7 – Add an explanation
- For our explanation, we will give it the name of Payslips and choose the Phrase list option, where we may enter words or phrases that will be used to identify the information we wish to extract. All my payslips contain the phrase PRIVATE & CONFIDENTIAL, so I have used this as my phrase (Figure 8). I have also selected the checkbox to match exact capitalization. With our explanation details completed, we may now click on Save.

Figure 8 – Choose a name and type for your explanation, and add a list of phrases
- Click on Train Model. If successful, you will see a Match against your files, as shown in Figure 9. However, if you see a Mismatch, you will need to add further explanations to provide more information and rerun the training.
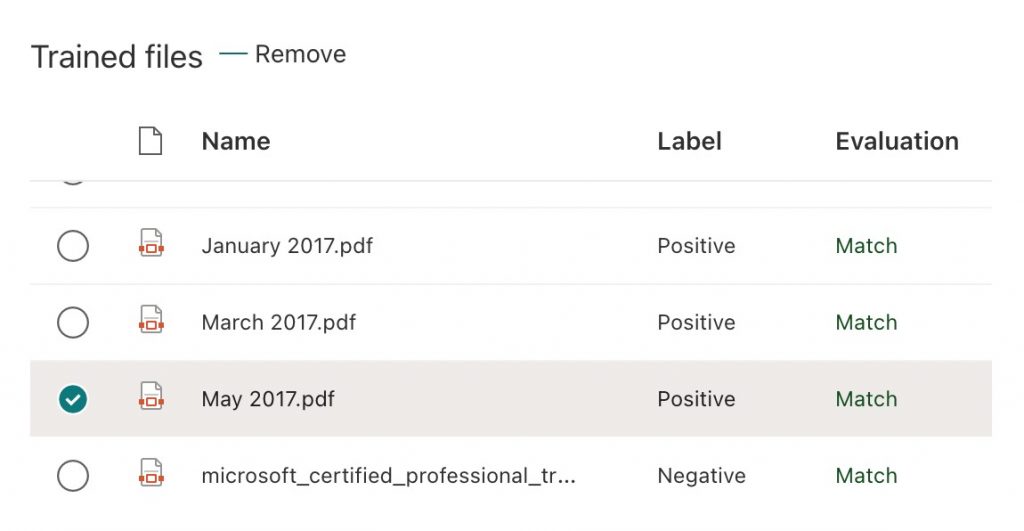
Figure 9 – File matching completed successfully
- In the preview pane against each file, we can see where a file has been Correctly predicted as a positive example. Similarly, we can see where a file has been Correctly predicted as a negative example (Figure 10).
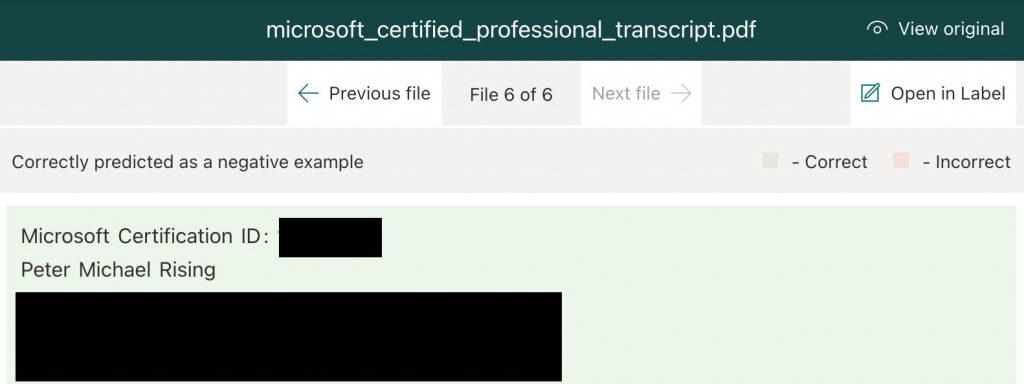
Figure 10 – Correctly predicted negative example
- Click on the Test tab within your classifier, and you may add and train further files if you wish or need to (Figure 11). Then click on Exit Training.
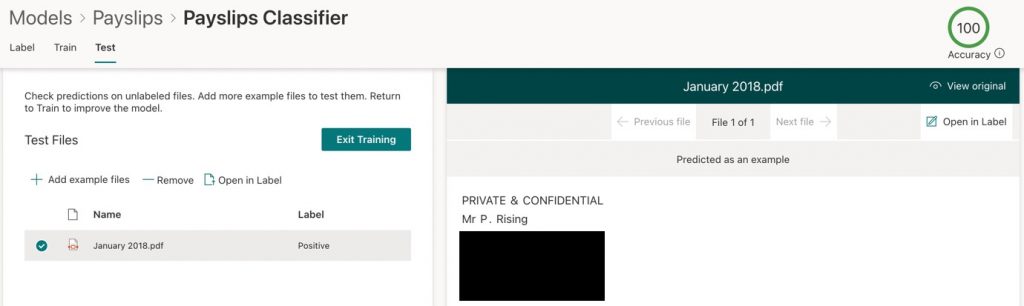
Figure 11 – Add further files if required and exit the training
- Next, back on the key actions page, we have an optional stage where we can create extractors that will extract specific information from our positively matched documents and display these as columns in the SharePoint document libraries to which our model is applied. Click on Create extractor.
I want to extract the date from each of my payslips, so I will create an extractor named Paid Date (Figure 12). Click on Create.
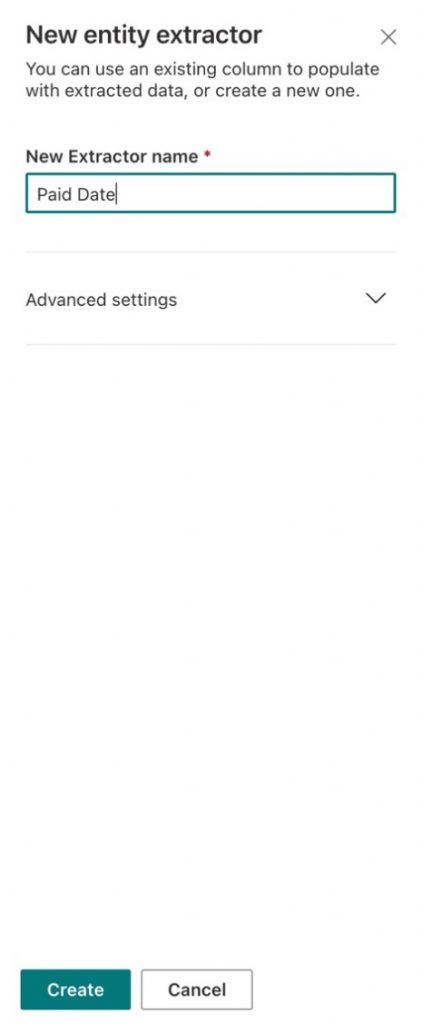
Figure 12 – Creating a new entity extractor
- From the Label tab of our new extractor, we need to scroll through each example file again and highlight the required information, which is the date from each payslip (Figure 13).
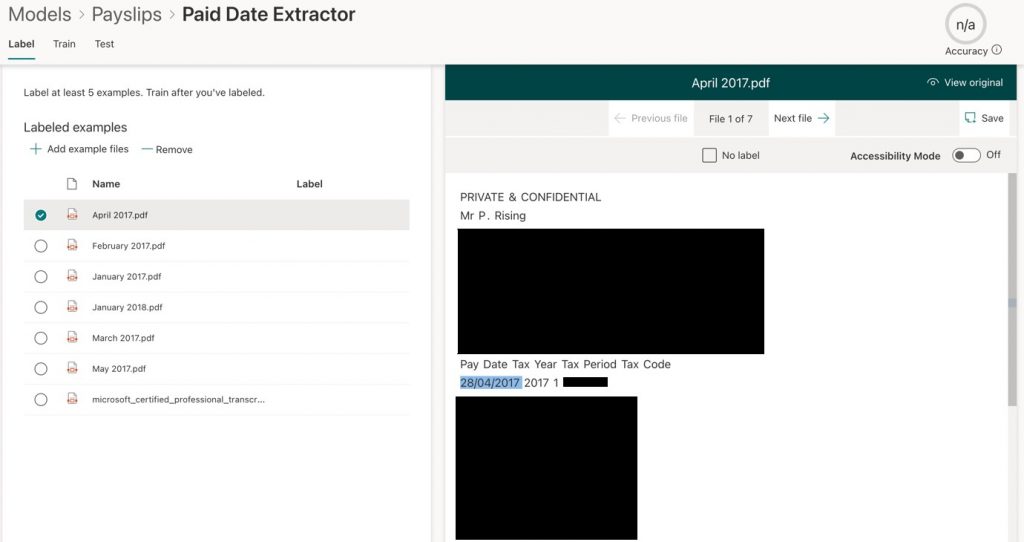
Figure 13 – Highlight the required information to extract
- Once a file has been appropriately labeled, click on Next file to move to the next one. When reaching the last file, which is my negative example, I need to click on No label for this one and then click on Save.
Next, I will click on the Train tab to train my extractor. I will need to add an explanation for the extractor at this point by clicking on Add explanation (Figure 14)

Figure 14 – Adding an explanation for the extractor
- I will name this explanation as Date Paid, and this time I will choose Pattern list as the type. As the pattern list will reference a date, I can choose to add a list of patterns from a template (Figure 15).
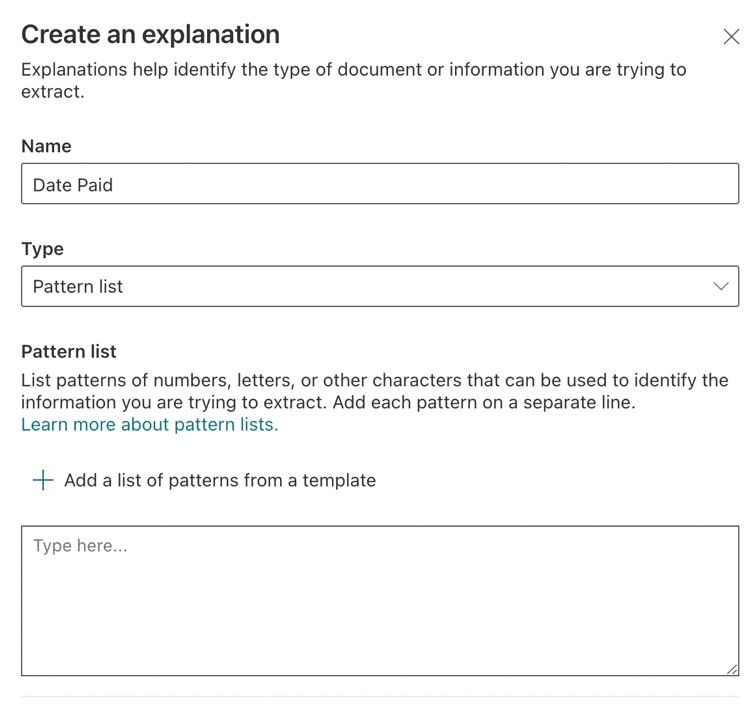
Figure 15 – Add and name and type to your explanation, and add a list of patterns from a template
- You will now see a list of the available explanation templates. Here I will choose the Date (Numeric) option below and click Add (Figure 16).

Figure 16 – Add the chosen explanation template
- The template patterns for the date format are added (Figure 17), and we may now click on Save.
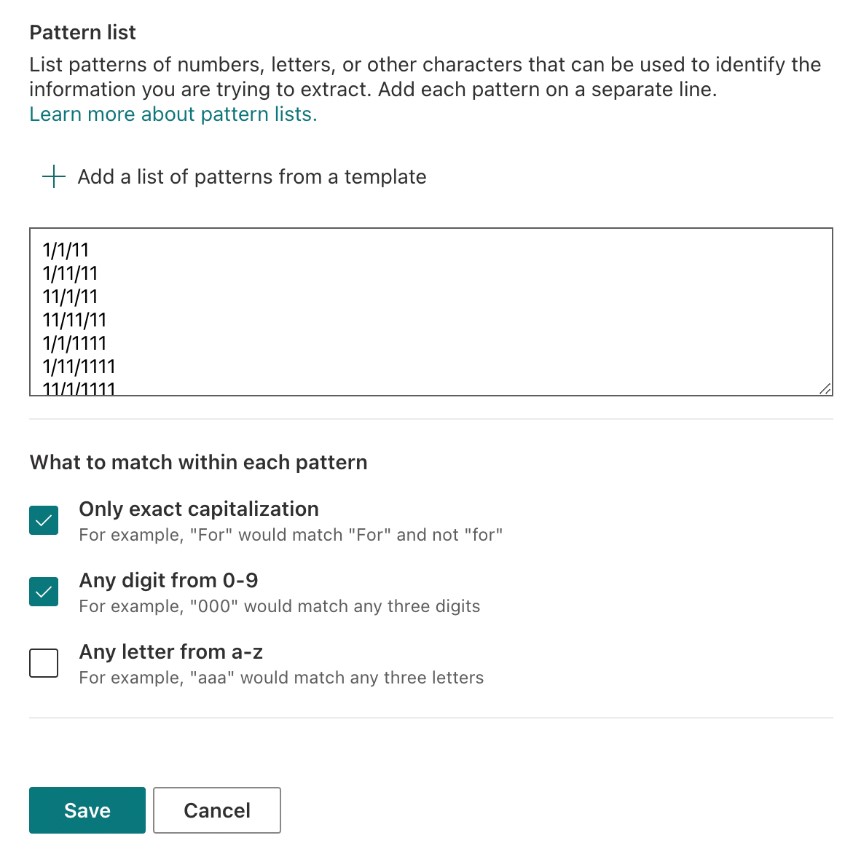
Figure 17 – Save the pattern list
- Now we need to click on Train Model for our new extractor, and hopefully, we will see a match as shown in Figure 18.

Figure 18 – Training the model for the extractor
- The creation of the extractor is now complete. Click the Test tab to complete further training if required, and then Exit Training when we are satisfied that the extractor will match the content we wish to be shown in a column in our document libraries (Figure 19).

Figure 19 – Click to exit the training of the extractor
- The final step is to apply the model to any chosen document libraries within SharePoint Online. To do this, return to the key actions page, and click on Apply model.
Select the required document library, then click Add. The Payslips model was now applied to my chosen document library. To open this document library, click on Go to the library.
You can immediately see that the document library shows some extra columns related to our newly applied document model. These include our extractor column of Paid Date and the Retention label column. The document model will automatically run against any new files added to this document library, or we can select files and then choose Classify and extract.
The result is that my payslips are all now shown with a Content-Type of Payslips, and extracted Paid Date value, a Retention label of Disposition Review Label, a Confidence Score, and a Classification Date (Figure 20).
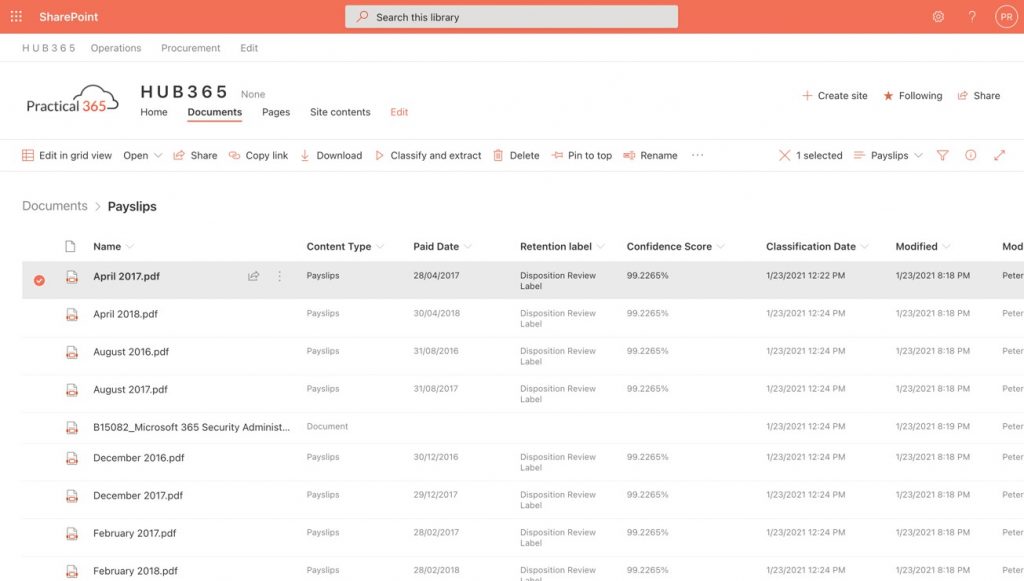
Figure 20 Document model shown applied to document library with added columns
Our Document understanding model is set up, complete with some compliance in the form of retention labels, and an extractor applied which shows extracted information in a column in the document libraries to which our model is applied.
Summary
This post showed you how SharePoint Syntex could be used to create document understanding models in the SharePoint Syntex Content Center. We learned how to add, classify and train documents with SharePoint Syntex, how to extract information from the documents that you mark as positive examples, and how to apply a document model to a SharePoint document library.
In part three of this blog series, we look at how forms processing models may be created from SharePoint document libraries using the AI Builder feature of Microsoft PowerApps.
Watch on-demand: TEC Talk webcast on the Five Practical Uses of SharePoint Syntex


Mr. Rising,
I have a plethora of questions. It seems information on model training techniques is scarce. I’d be grateful for any direction you can provide in the way of resources for learning more advanced model training techniques, tips-and-tricks, etc.
Hello Peter,
If we need to do a multiclass document classification do we need to create multiple models and apply it to the same library ? As I understand it a DU model here is doing a binary classification only ?
Hi Peter, your blog is really good.
I wanted to know if you used the checkbox explanation template. I was trying to use it but I couldn’t capture the value (true/false) from checkbox.
Andres,
It looks like the checkbox explanation template only works if the result of the checkbox is an “X” or some variation. I also don’t see a way to get it to work where the checkbox value is from a PDF form where the true value is a solid box for example (as opposed to some text value). Anyone else get this to work?
Yes you can load different file types, it doesn’t have to be PDF’s. It can be word docs, excel sheets etc.
Hi, in you example, you have labeled files with positive and negative examples. In both situation you have uploaded *.pdf files. Can we upload at the same time two or more type of different files, like instance *.pdf and *.eml files?