
In Part One of this blog series, we showed you how to create a new SharePoint Online Communication Site to serve as an Intranet landing page. We took you through the process of creating a SharePoint Online site, and then added a company logo and changed the site name.
Having done all this, the site is starting to feel a bit more personal to our brand. However, the top bar and accent colors on our page are still looking a bit generic. It would be nice if we could change these to our company branded colors. To do this, we can use Theme Generator, and a little help from the SharePoint Online Management Shell.
Create a custom color theme using the Microsoft Theme Generator
SharePoint Online has a number of built in themes that you may choose from in order to customize the look and feel of your pages. However, there are a limited number of themes which consist of mainly primary colors, and the likelihood of one of these being an exact match for your organizations branding is extremely slim. Here, the Microsoft Theme Generator can help, this is a tool which allows you to create a custom theme and upload it to SharePoint Online.
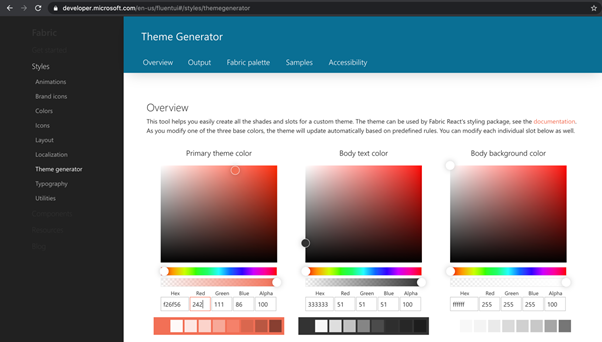
The Microsoft Theme Generator tool can be found at https://developer.microsoft.com/en-us/fluentui#/. Before you begin using this tool, you will need to know the hex codes of your primary and accent colors that you would like to be present in your site theme. There are a number of hex code color picker tools available on the internet where you can quickly get your codes if you don’t already know them.
In the example below, I am only going to upload a Primary theme color. In this case #f26f56 which is the Practical 365 orange.
Once I have entered my hex codes, it updates the output in JSON, SASS, and PowerShell format as shown below.
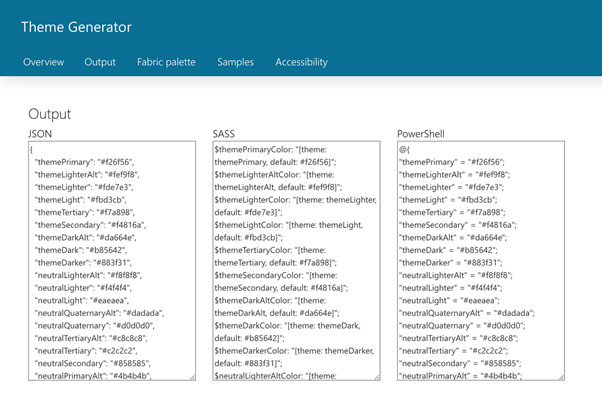
In this instance, I will use PowerShell and will copy the content shown in the PowerShell box above and paste it to a TXT file for use in the next steps where we will be connecting to the SharePoint Online Management Shell.
Note: If you would like to explore the other methods shown in the Output selections in the above image, please refer to the Microsoft documentation.
SharePoint Online Management Shell
To upload our new theme to our tenant using the SharePoint Online Management shell, we need to complete the following steps.
- If you do not already have access to the SharePoint Online Management Shell, you may download it directly from Microsoft here.
2. Once downloaded and installed, you may connect to the SharePoint Online service by running the following command.
Connect-SPOService -Url https://yourtenantname-admin.sharepoint.com -credential username@domain.com
This command will execute in the SharePoint Online Management Shell as shown below.

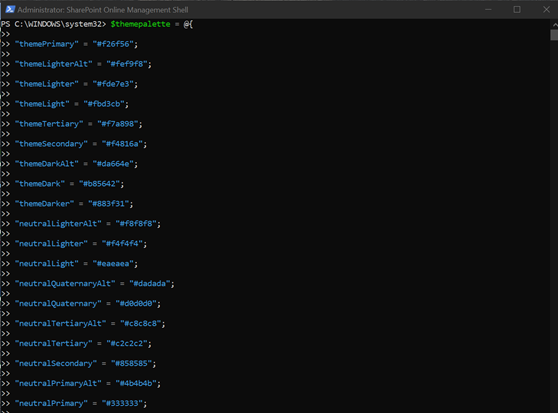
3. Now that we have connected to the service, we need to input the PowerShell code that we copied from the Theme Generator in the previous step. We just need to add a variable at the start of the code of $themepalette = as shown at the start of the full code sample below.
$themepalette = @{
"themePrimary" = "#f26f56";
"themeLighterAlt" = "#fef9f8";
"themeLighter" = "#fde7e3";
"themeLight" = "#fbd3cb";
"themeTertiary" = "#f7a898";
"themeSecondary" = "#f4816a";
"themeDarkAlt" = "#da664e";
"themeDark" = "#b85642";
"themeDarker" = "#883f31";
"neutralLighterAlt" = "#f8f8f8";
"neutralLighter" = "#f4f4f4";
"neutralLight" = "#eaeaea";
"neutralQuaternaryAlt" = "#dadada";
"neutralQuaternary" = "#d0d0d0";
"neutralTertiaryAlt" = "#c8c8c8";
"neutralTertiary" = "#c2c2c2";
"neutralSecondary" = "#858585";
"neutralPrimaryAlt" = "#4b4b4b";
"neutralPrimary" = "#333333";
"neutralDark" = "#272727";
"black" = "#1d1d1d";
"white" = "#ffffff";
"primaryBackground" = "#ffffff";
"primaryText" = "#333333";
"bodyBackground" = "#ffffff";
"bodyText" = "#333333";
"disabledBackground" = "#f4f4f4";
"disabledText" = "#c8c8c8";
}
The code is executed as follows:
4. Once this has been entered, we need to run the command to upload our theme to SharePoint Online. This is done by executing the following command.
Add-SPOTheme -Identity “Practical 365” -Palette $themepalette IsInverted $false
The successful execution of this command is shown as follows.

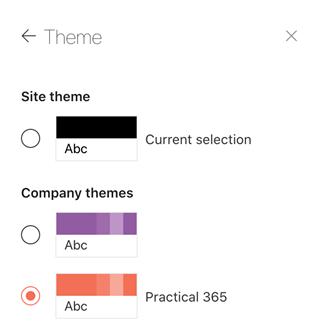
Applying a custom colour theme to your site
Now that we have uploaded our theme to SharePoint Online, we can return to our new site landing page and activate our theme. This can be done by clicking the cog wheel at the top right of the screen, then selecting Change the look, and selecting Theme. We can see as shown below that we have new custom theme available in our themes list named Practical 365.
Once we select this theme, it will apply the look to our new page. This is shown in the following image:
So, now we have our Communication site page ready, we have our logo, site title, and site theme applied.
The next step in creating our Intranet is to populate our landing page with content which is going to be relevant to our users. It is important to give a lot of thought and consideration to what is going to be included on the landing page. This page is going to be the starting point for our users and if it is going to be successfully adopted, then it must have the right content.
Let’s look at how we can add the required content to our new landing page.
Building your Homepage
In order to build out our landing page, we need to populate it with some web parts which contain useful and informative information for our users. There are many web parts which can be added and a variety of column layout settings that we can choose from.
In addition to the web parts that I recommend and will be adding in the steps below, you may also wish to choose from the web parts shown in the following image and include them on your own landing page.
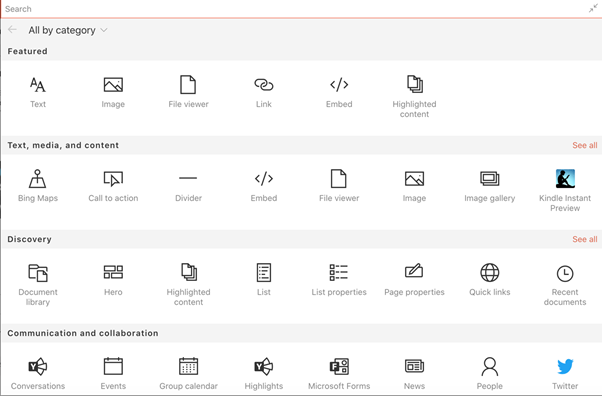
The Image web part is useful if you want to add a banner to your landing page, and the Twitter feed is also something that my customers like to add. Group Calendars and Events are also useful web parts that could have a place on any landing page.
Whenever I create a new Intranet homepage on SharePoint Online, I always tend to include the same layout and web parts because it works well and looks good. I’ll base the following examples on these choices, but of course you are free to configure your own web parts as you choose.
I normally recommend the following web parts to be added when I am creating an intranet landing page.
- Hero – Prominently display up to 5 pieces of content in a highly visual layout
- Quick Links – Add links to important documents and pages
- News – Display recent news
- Weather – Show current weather conditions on your page
- Image – Show an image on your page (such as a banner)

Adding web parts
In order to edit our home page, we need to complete the following steps.
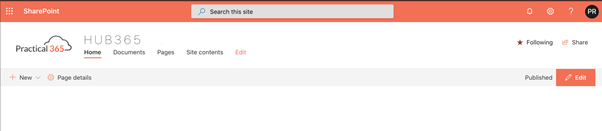
- Navigate to our new home page and click on the Edit button on the information bar as shown in the following image.
Note: The information bar is only visible to Site Owners and Administrators.
2. The page will change into edit mode as shown below:
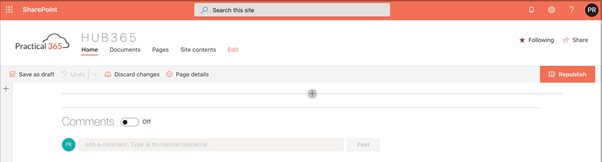
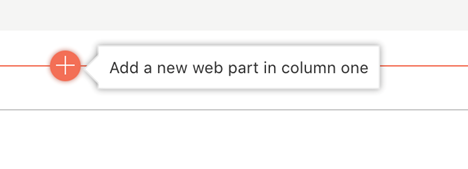
3. Click on the + to Add a new web part.
Add a Hero web part
The first web part that I like to add as the focal point for the landing page is the Hero web part. This is a visual web part which is designed to grab the attention of your home page users.
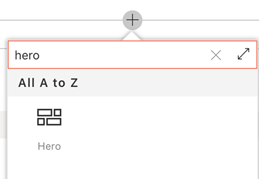
- When you click to add the Hero web part, it will initially display as shown below.
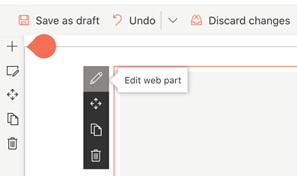
2. Click on the pencil symbol to edit your hero web part.
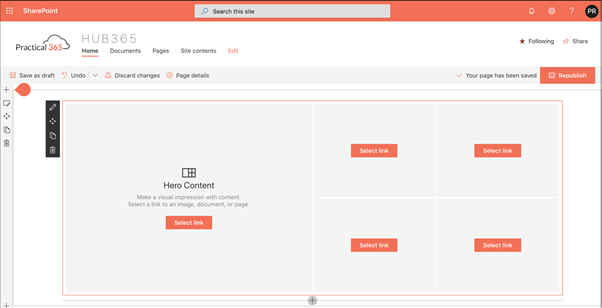
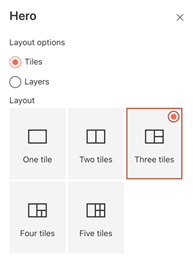
3. You will see the following layout options. My preference is to have three tiles, but you can select whichever suits.
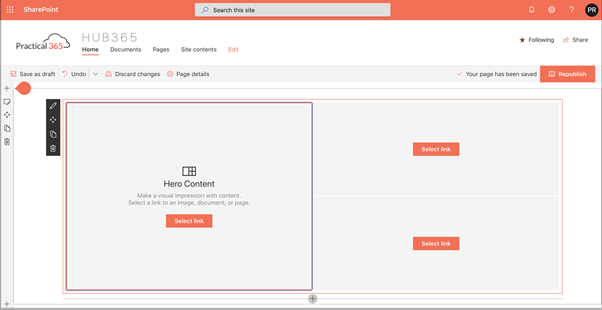
4. The Hero web part now shows as three tiles as shown below. Click on Select link on any of the tiles to populate the web part with some content that you wish to promote on your landing page.
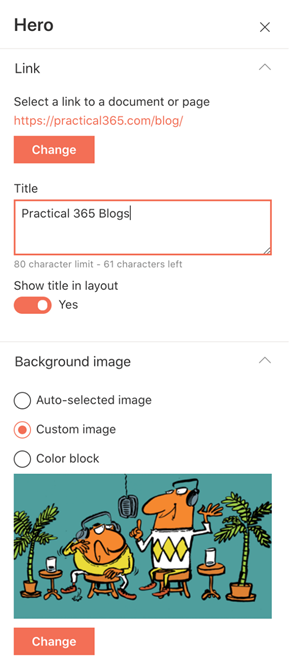
5. In the following example, I have populated the first Hero web part with a web link, provided a title, and uploaded a custom image.
6. Once these settings are added and saved, the first Hero web part tile is populated as shown below.
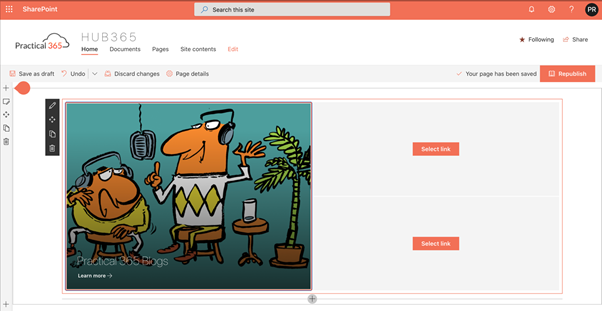
7. I went ahead and added content to the other tiles and then clicked on Republish to make my additions available to all users.
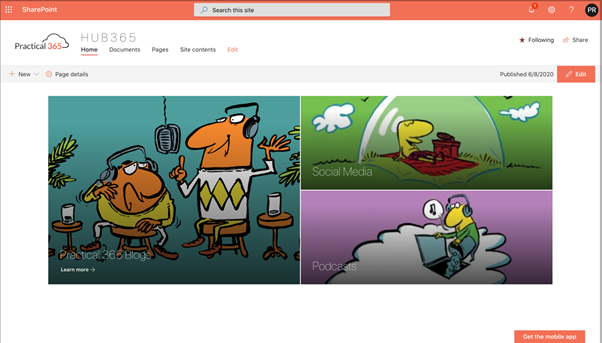
As you can see, the Hero web part is a very powerful visual method to communicate instant information to your audience.
Summary
In this post, I’ve taken you through the steps to start populating your new SharePoint Online Communication Site with content by editing the page and adding sections and web parts. We looked at how the Hero web part is an extremely visual way of promoting featured content at the top of your landing page.
In part three of this blog series, we will show you how to complete your landing page by adding further sections and web parts in various formations on the page in order to produce a modern and professional intranet landing page experience.


Thank you for this, it has been pretty helpful for someone that never worked with Sharepoint before.
I really enjoyed this, but is part three still in the making
Thanks Hendrik. Part three is here – https://practical365.com/creating-a-modern-sharepoint-online-intranet-part-three/
Excellent articles, thanks!
Couple of typos in the Powershell command, caused errors and took me a bit to notice:
Add-SPOTheme -Identity “Practical 365” -Palette $themeplaette -IsInherited $false
Should be $themepalette -IsInverted
i.e.
Add-SPOTheme -Identity “Practical 365” -Palette $themepalette -IsInverted $false
Hi Dov,
Thanks for the kind words. Good spot on the PowerShell typos, my apologies for that, we will get this corrected.
This is great!! 🙂 but what happened to part 3? 🙁
Hi Peter, I can’t get full view of contents I uploaded to Hero web part even after I publish, any idea what I am doing wrong? I cannot drag sides to expand size. Thanks
Hi again Howard. The contents on this page may be of additional help to you – https://support.microsoft.com/en-us/office/use-the-hero-web-part-d57f449b-19a0-4b0d-8ce3-be5866430645. However, if you’d like to ping me a message via Twitter – you can find me at https://twitter.com/M365Rising. I’d be happy to chat with you and get a better understanding of what you have tried.
Hi Peter, I guess the hero web part can only surface images and short paragraph that points to a full document. I tried to surface a pdf document and the hero column showed partial pdf but when I click the the full document is displayed. Blame it on the novice. I will continue to practice. I am not sure if I can share a link to the SharePoint site I set up.
Cheers!
Excellent! Thank you. I am desperately re-tooling myself to be relevant and this is great. I have spent countless hours on purchased online courses and your three-part series has given me confidence to hopefully find a job.
Thank again.
Hi Howard, really pleased to hear you liked it.
I’m so grateful to you for posting this. I could not find any other articles on building a landing page in sharepoint and got zero help from our IT team.
Thanks Phillip. Really pleased that you have found it useful!
Far too quiet in here sir, you deserve some credits for this! Great articles and very well explained. I prefer a different layout as the Hero part is too bloat. On left i always put links to articles/Company news and on the right i put tiles to saas apps.
Thank you so much for your kind words. This is what I love about SharePoint Online. So many different options to build something unique to your needs. Even since writing the article I’ve seen further great examples of the way people have designed their home pages, with sections and web parts arranged in ways I had not imagined myself.
I do tend to agree with the Hero web part being a bit bloated, but a lot of my customers really love it.
Thank you again!