Phishing attacks happen to every company across the globe daily. Whether you have 10 or 100,000 users, they will still receive junk, spam and phishing emails. The Anti-Phishing Working Group 2nd Quarter Phishing Report of 2018 portrayed a 46% increase in detected phishing sites from January to March 2018. It is inevitable that phishing attacks will proceed to increase in the future. In this article, we will discuss how to deploy the Microsoft Report Message add-in to allow your end-users to assist in reporting of phishing emails to Microsoft EOP, Exchange Admins and your Security Officers.
Phishing email attacks
A phishing email is a fraudulent attempt to gain information such as your username, password or credit card information. A user receives an email that looks legitimate with the intention of the user clicking on the malicious URL that will look almost identical to a regular Office 365 login page. If the user enters their username and password, the attacker stores this information in their database for later use. They now have full access to your Office 365 account or other platforms unless you have additional security in place such as Multi-Factor Authentication (MFA).
Below are examples of one legitimate and one phishing email which we have received. Can you guess which one is which?
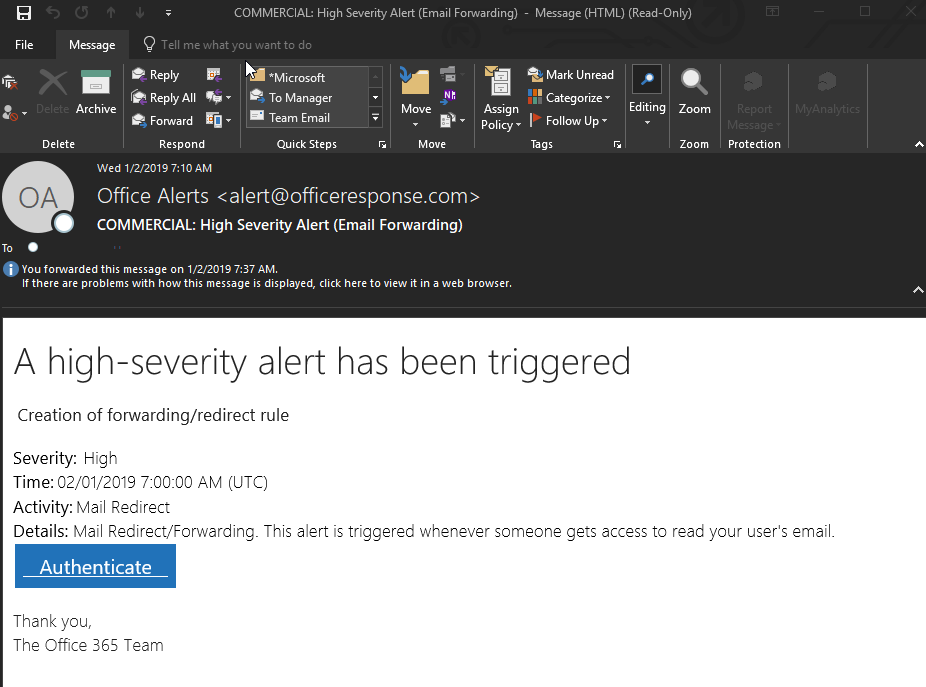
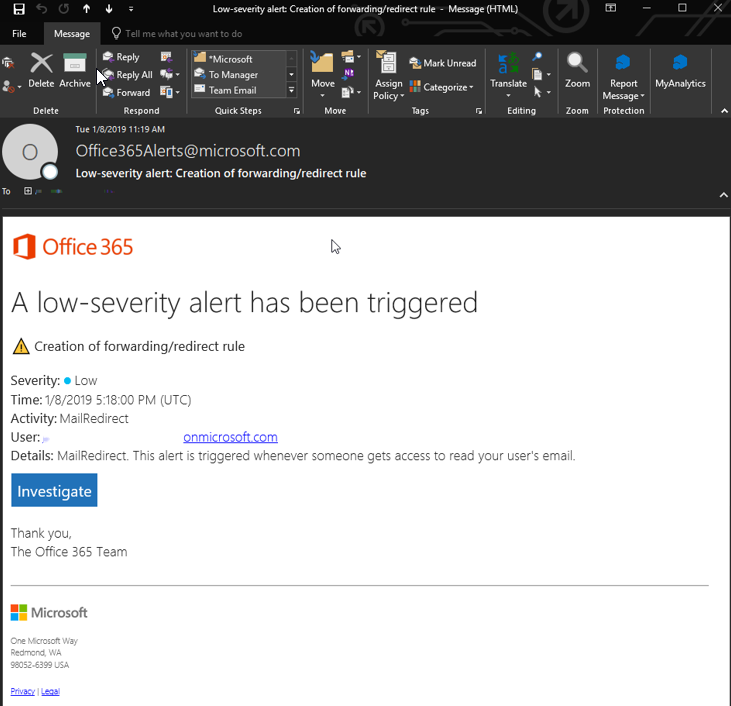
You probably guessed the first email is the phishing one. Here are some key indicators on how to determine if it’s a phishing email:
- Verify the sending email address: do you know this person or not? In the first email, we see the sending address is “Office Alerts <alert@officeresponse.com>”. This is not a Microsoft email address if you’re unsure I would advise checking online. The second email shows the address being “Office365alerts@microsoft.com” which appears legitimate because it is an actual email address from Microsoft.
- Examine the email for grammar errors: In the first email, you can see the word Authenticate has an underline that is not proportioned correctly. Other indicators are to check the salutation. Is it your name, or Customer or Colleague? Most legitimate users will email you with the correct salutation.
- Preview the URL link address: hover your mouse of the link and examine the details that come up. Review this, but do not click the link. Does the URL look ok at first glance, or does it look suspicious?
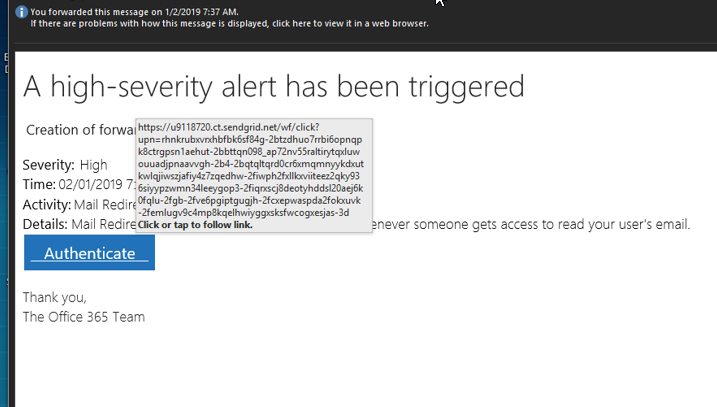
When you hover your mouse over the link it will show you the details to the URL it will go to before clicking. The phishing email URL goes to http://u9118720.ct.sendgrid.net

If you are still suspicious, be cautious and forward the message to your helpdesk, Exchange Administrator or Security Officer for review. If you have a security team, they should be able to examine the URL through security tools or sandboxing the URL. If the URL is malicious they would block the URL from being accessible from your network.
Microsoft Report Message Add-in
The Microsoft Report Message add-in helps users report Junk, Not Junk and Phishing emails natively from the Outlook client and Outlook on the web. The emails submitted to Microsoft are evaluated and relevant findings are then fed back into their detection and Machine Learning models. Messages are finally reclassified if needed and updated in the Microsoft Spam filter databases across the globe.
Any message that is sent to Microsoft is evaluated at a network-wide level. By alerting Microsoft on these messages, it helps both you and all Office 365 customers across the globe improve their spam filtering. The Microsoft spam team will evaluate each submitted message for the from address, sending IP address, keywords, phrases, frequency, and other trends.
Did you know the Microsoft Spam team are referred to as Spam Cops? At least this was the case in 2012 when this video was released.
There are two methods of deploying the Report Message Add-in feature. The first being to individual accounts, and the second option for deploying across your tenant or to specific groups. The Report Message add-in works with your Office 365 subscription for the below products:
- Outlook on the Web
- Outlook 2013 SP1
- Outlook 2016
- Outlook 2016 for Mac
- Outlook included with Office 365 ProPlus.
If you have the above products you can deploy the Report Message Add-in to your account manually.
How to deploy the Microsoft Report Message Add-in to yourself
To deploy this yourself, complete the following steps:
- Visit Microsoft AppSource and click Sign in in the top-right corner.
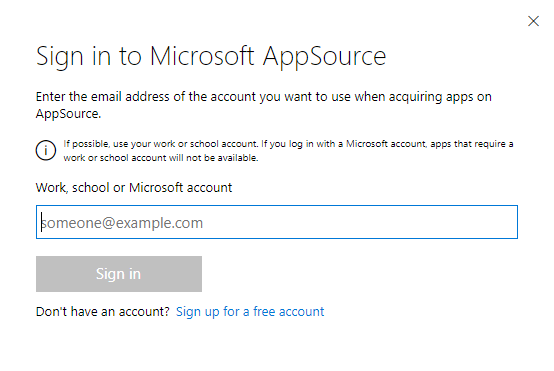
- Enter your account information and click Sign in
- Search for th Report Message add-in
- Select Report Message
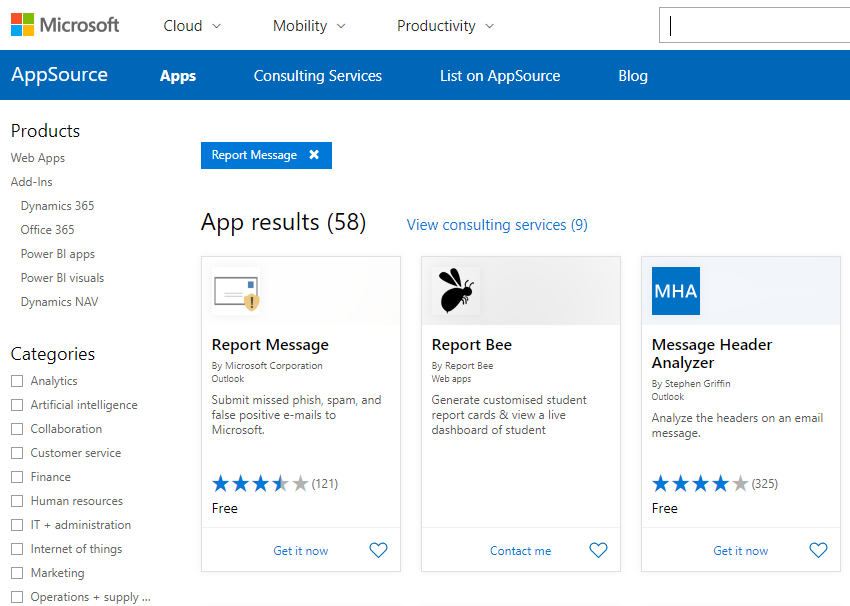
- Click Get It Now
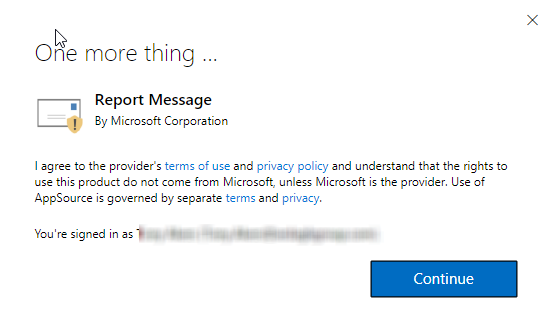
- Review the terms and conditions and click Continue
- Finally, click the Add button to start the installation
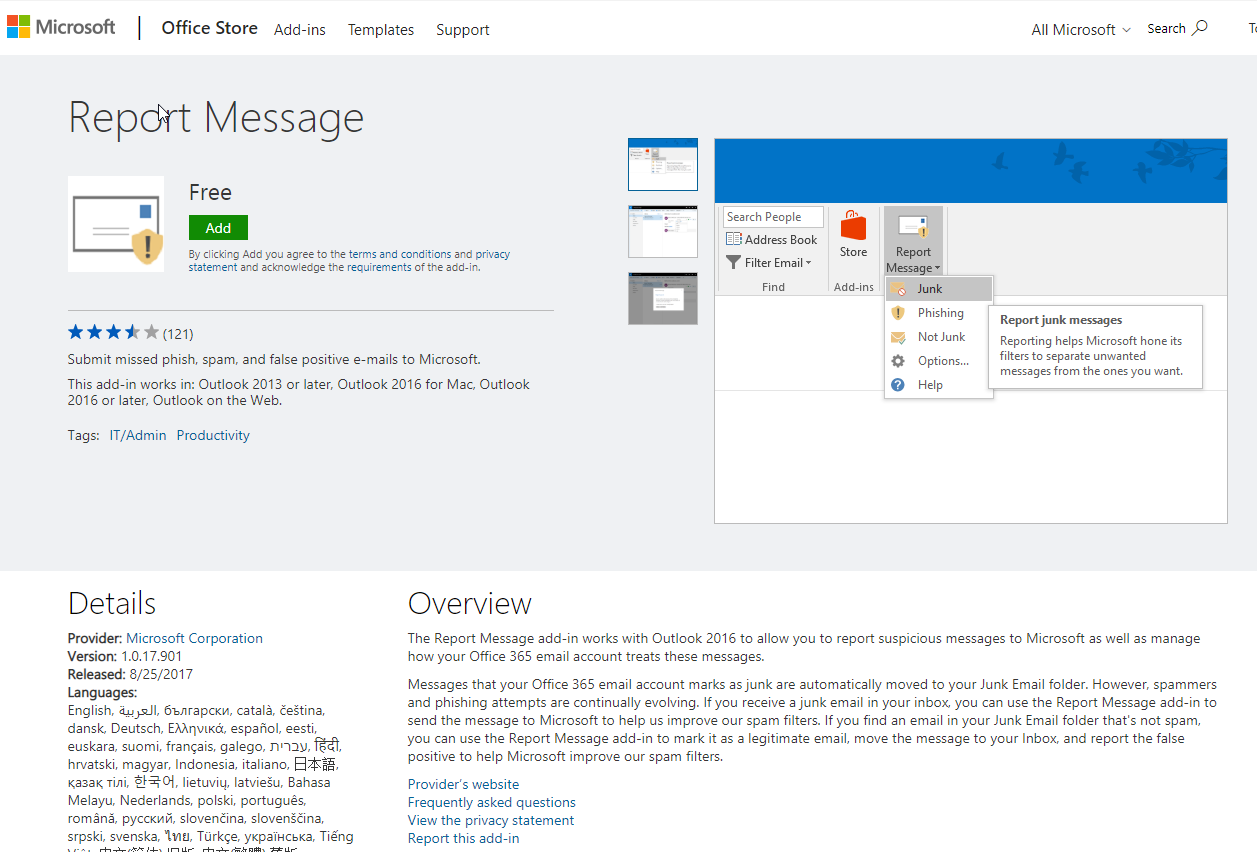
Once the installation of the Report Message Add-in is complete you can close and reopen Outlook. At the top of the menu bar in Outlook and in each email
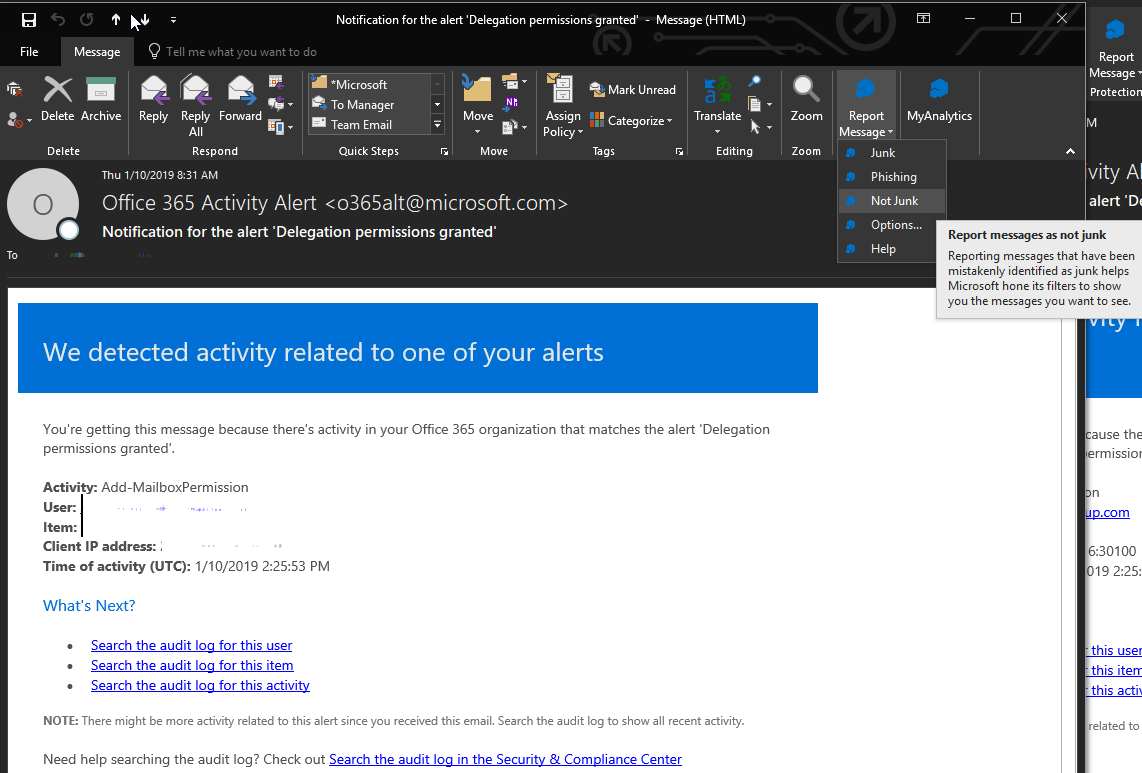
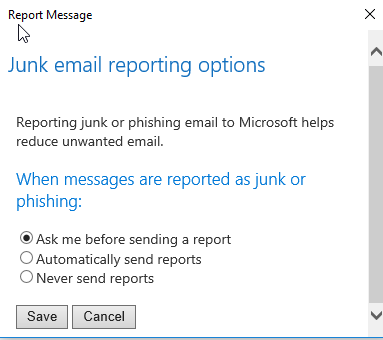
Let’s review the options of the Report Message Add-in. Select the Report Message Add-in in the drop-down and select Options. There will be three options available:
- Ask me before sending a report
- Automatically send reports
- Never Send Reports
The recommended option here is the default Ask me before sending a report to remove any inaccurate submissions from users and to confirm the user wants to report a message to Microsoft, after you’ve completed this click Save.
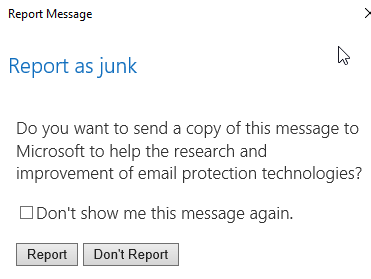
When a user now selects to report a message, they will be prompted if they are sure they want to report the message.
Now that we have covered the basics of phishing threats, detection tips, and walked through how to deploy the add-in for yourself, in part two of this blog series, I will talk you through how to deploy the Microsoft Report Message Add-in via Centralized Deployment in your Office 365 tenant.


Typical Microsoft logic that would leave this button as an option, and evidently doesn’t even exist for the Mac client Outlook. Where is the legacy email address simply to forward these suspicious emails directly to Outlook? Why require an add-in at all?
You can find them here:
https://docs.microsoft.com/en-us/microsoft-365/security/office-365-security/use-mail-flow-rules-to-see-what-your-users-are-reporting-to-microsoft
Phish mails: phish@office365.microsoft.com
Junk mails: junk@office365.microsoft.com
Not Junk: not_junk@office365.microsot.com
Hi Tony,
Great article; thank you! I’ve always wondered what are the differences between Outlook’s Junk Email feature and the O365 Report Message function? What should end-users be relying on?
Microsoft indicates it in one of its documentation, they receive so much information every day from users that they are not able to process them all.
This add-in should be included by default. As i didn’t know about it, we were using reporting button in OWA (Office 365). Although, after reporting same type of messages like 10 times for a few weeks and still receiving them i had to create a mail flow rule. MS should act faster on repots.